Everybody has his own beautiful pictures for weddings, birthdays, Christmas or indeed any occasion, either the ones taken by digital camera or the scanned old ones. Now, if you have Microsoft PowerPoint, you can create a unique photo album without buying additional photo slideshow software. You can also make it to be a self-running slideshow and distribute it with others.
Creating an album with PowerPoint
Step1: start PowerPoint2007, click on the button Photo Album on the Insert tab and select the New Photo Album...
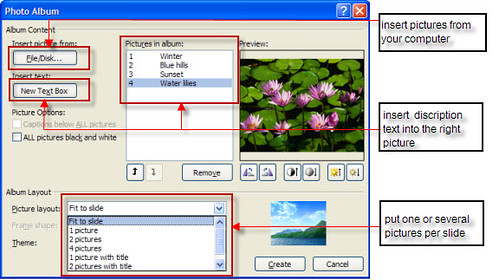
Step2: In the Photo Album dialog box, add the pictures you want to include in your photo album.

Step 3: Add a picture from a file or disk.

1. Under Insert picture from, click File/Disk…
2. Locate the folder or disk that contains the picture you want to add to your photo album, click the picture file, and then click Insert.
Notes: If you want to add a large group of pictures to a new photo album all at once, after clicking File/Disk in the Photo Album dialog box, select all the pictures that you want to add to your photo album, click Insert.
Step4: Set up the album layout.
1. Select the picture layout below:
Picture: layout your pictures with title.
Fit to slide: layout your pictures unable to change frame shapes.
2. Select a shape in the Frame shape list that you want to use with your pictures.
3. Theme: click Browse, and then in the Choose Design Template dialog box,locate the design template you want to use, and then click Select.
Step5: Click Create. Then you are complete a photo album.
Note: You can edit the photo album at any time. Once your digital photo album is created, it is totally editable. Click on the button Photo Album on the Insert tab and select the Edit Photo Album...
You may also want to insert audio and video files to your presentation to make your presentation more vivid. Find some tutorial please click to How to Add Music Song to PowerPoint Presentation and How to Add Various Videos to PowerPoint Presentation.
Setting and rehearsing photo album timings
After completing your slideshow, you may want it to play automatically. Then you can save your photo album as PowerPoint show. Furthermore, before you save your PPT as PPSX format you need to set up the exact time duration for each slide so that it can run by itself. For more details, please click How to Timing Automatic PowerPoint Presentations.
Sharing your photo album
Now, you have created a unique self-running photo album with PowerPoint, you can share or distribute it out freely.
1. Share with everybody around the world.
You can upload your slide show on websites to hit this target. There are two popular methods for you:
1>Share on YouTube:
YouTube only accepts video formats in WMV and MP4. To put PowerPoint slide show on YouTube, we must convert PowerPoint file to WMV or MP4 video. You can try this tool:PPT to YouTube or PowerPoint to video converter.
2>Share on some presentation sharing sites:
You can upload your photo album presentation to some free share websites, just like slideshow and slideboom.
2. Share with people who have both computers and PowerPoint.
In this method, you can share your slide show by sending it directly to recipients who own both computers and Microsoft PowerPoint. By this way, you should always put your audio or video files and presentation file together in the same folder, zip it and send it to the recipients.
3. Share with people who don’t have Microsoft PowerPoint installed.
Sometimes, our recipients don’t have a Microsoft PowerPoint installed on his computer or you have a different PowerPoint version from your recipients. Then you can package your photo album presentation to CD.
4. Share with people who don’t own a computer.
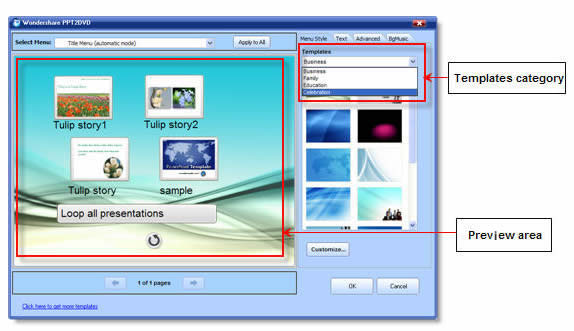
There is a fact that not everyone owns a computer, especially the elders. How can you share your photo album with your recipients who don't own a computer? PPT2DVD will help you save your PowerPoint slide show to DVD slide show. The output DVDs can be viewed on TV through DVD player. Here is a tutorial for you:
How to view PowerPoint presentation on TV.